Diff Mount Installation Photos
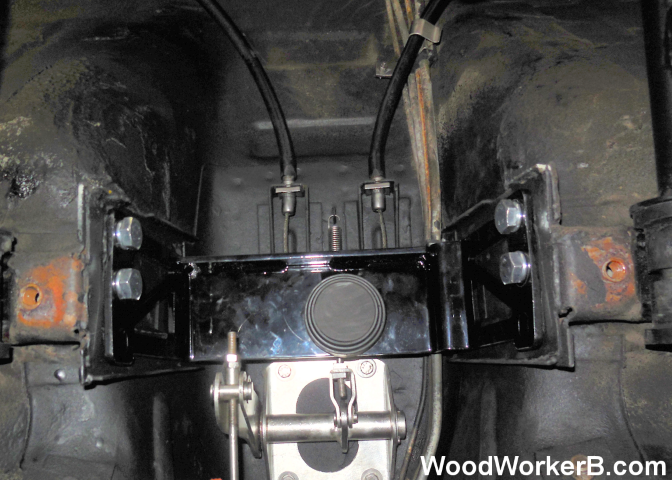
This shows the bottom view of the Diff Mount installed. In this shot the differential and drive-shaft have been removed, and the front of the Z-car is towards the bottom of the picture. Note that the Diff Mount bolts to the same holes as the original restraint strap. Depending on your car, you may use a different set of holes in the Diff Mount.
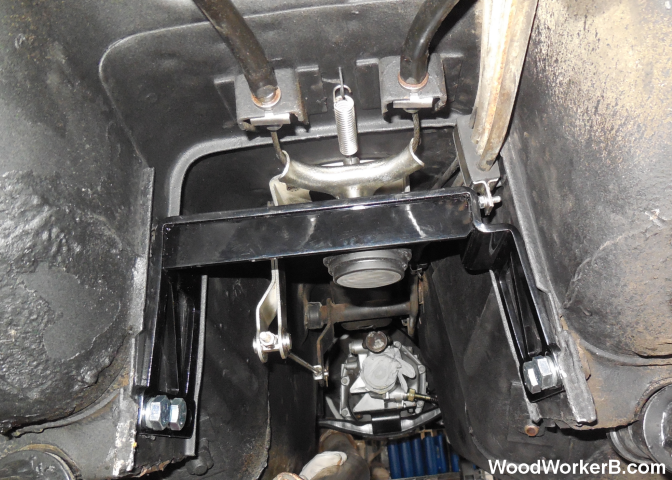
This picture shows a view of the Diff Mount installed, viewed from the rear of the car. In this shot the differential and drive-shaft have been removed, and you can see the rear of the transmission.

This picture shows a view of the Diff Mount installed, viewed from the front of the car. In this shot the drive-shaft has been removed, and you can see the front of the differential. Note how the snubber has been trimmed so that it lightly presses down on the top of the differential. The stock Datsun bottom mount has been retained.
Acknowledgement
These photos were kindly provided by Brian Volken, showing his installation of the TechnoVersions Diff Mount. You can visit his web site for more useful information about his Datsun project: WoodWorkerB Website.